
Surfing Lessons – The Most Important Next Steps
The 10 Most Important Next Steps after your surfing lessons. From how to wax your surfboard to practicing proper surfing etiquette.
Some links on this page are affiliate links. If you buy through them we may earn a small commission, at no extra cost to you — it never affects our verdict. How we make money.
In this article
In this article, you'll learn
- Which surf break suits your skill level after lessons
- How to choose the right surfboard instead of copying the pros
- How to read tide tables and spot dangerous rip currents
- Why surf etiquette rules like not dropping in matter so much
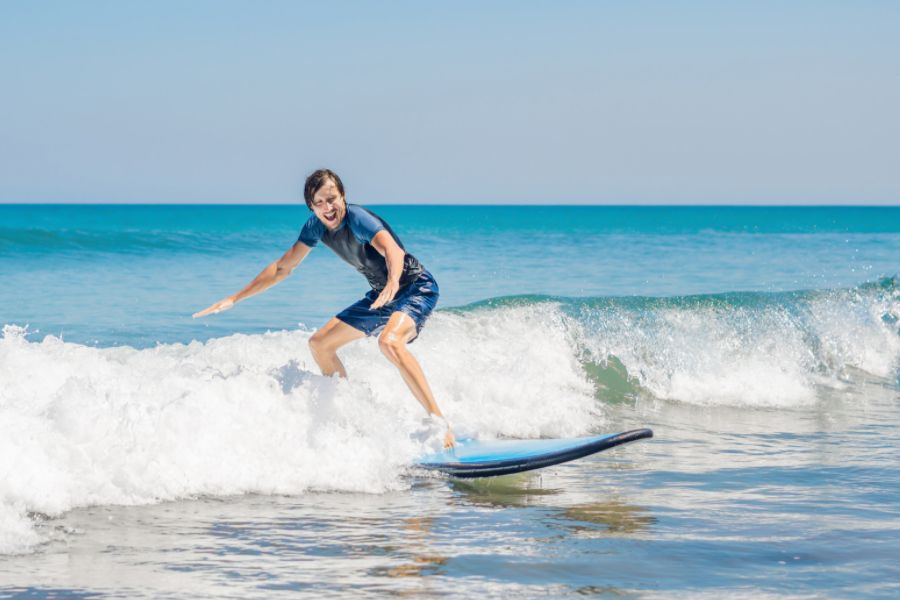
So, you've taken surfing lessons and now you’re hooked on surfing.
Despite the nose dives, the sand and salt-water-filled sinuses, the cramped shoulders, and the wetsuit rash.
During your surfing lessons you experienced the “only a surfer knows the feeling” exhilaration that comes from riding upon a moving body of water. I guarantee that a part of every day is now spent thinking about breaking waves.
Have you noticed that each time there’s an ocean backdrop on the TV, you’re checking the waves?
Chances are you’ve taken the modern route to surf addiction. Perhaps you’ve had a few lessons on a giant foam board. A professional instructor took you through the various surfing dynamics on the beach before embarking on the gentle white-water waves.
Maybe you borrowed a surfboard from a friend or family member. Hopefully they were good enough to give you a few tips. They might have even pushed you into a few waves.
Regardless of how you were initiated into the world of wave riding, you are now well on your way to becoming a surfer.
Congratulations!
The 10 Most Important Next Steps to Becoming a Surfer
Here at Surfd.com, our goal isn’t to give you surf coaching as such. There are plenty of highly regarded and qualified coaches to help you improve your technique. Our goal is to offer you the 10 Most Important Next Steps toward being a surfer, following your surfing lessons.
What’s the difference, you may ask?
Surfing is full of intricacies that only come into play once you leave the safety of the instructor-led surfing lessons. We’re talking about things that seasoned veterans take for granted as second nature. Simple elements that can present a veritable minefield for the less experienced.
We have included:
- Information about surfing hardware.
- Weather conditions and tides.
- Surfing etiquette.
- Reading ocean conditions.
- Essential equipment maintenance.
And much more.
We aim to provide you with information that may otherwise take years to accumulate. Information you don't necessarily learn during surfing lessons. We will hopefully help you build confidence and experience.
A good friend of mine, who became a fantastic surfer, spent his first couple of years tripping over his leash.
His development as a surfer was slowed simply because no one had told him to attach the Velcro strap to his left ankle (he was a goofy foot) rather than his right ankle. When he switched ankles his progression improved literally overnight.
I'm not saying we will show you how to put on your leash (I hope your surf instructor did!). But you get the idea.
There are easy-to-understand breakdowns of the essential information. We will also give you tips from industry experts.
So, sit back and enjoy the 10 Most Important Next Steps as a beginner surfer.
Improve Your Surfing Fitness
The internet is full of training routines. However, most are aimed at intermediate surfers or aspiring pros. The purpose is to improve the dynamics of certain moves, or create explosive movement for aerial surfing.
As a beginner taking the next step toward becoming a surfer the importance is to prepare your body for the rigours of surfing, and reduce the risk of injury.
I'm certain the hardest part of your initial lessons was paddling and getting to your feet. You were exhausted after a few attempts, and no doubt you were sore in places you didn't know existed for the next couple of days.
A great start in your journey as a surfer is to address the above issues.
Working on upper body strength endurance (push ups, dips, pull ups etc) will help you become a stronger paddler and develop a more effective pop up.
Aerobic based cardio training (swimming, running, cycling, rucking etc, at 70-80% of maximum heart rate) will help you develop your heart and lungs to the level required to cope with a couple of hours in the waves.
Full body mobility exercises (yoga, pilates, flexibility training) will train your muscles and joints to withstand the unique movements and angles that riding a surfboard demands.
I recommend a consultation with a professional fitness coach, whether face to face or online. The coach will build a personalized program specific to your needs and current fitness level.
Check out Koa Smiths SurferFit program for an all inclusive approach to fitness training.
I am currently training a Quiksilver team rider and will happily share some of his sessions, just let me know in the comments.
"We’ve just been developing a lot of similar movement and training that mimics the movements you do in the water, whether that’s paddling or balancing or one-legged balancing things or explosion or being able to decompress after doing a turn or whatever it is. We kind of just cater it based on surfing and I feel like it’s been working really good"
Ezekiel Lau, WSL Pro and winner of The Ultimate Surfer
Surf at the Most Suitable Break
This might sound a bit obvious but the type of spot you are surfing will dictate your progress. Generally surfing lessons occur at easy beach breaks.
Some surf breaks are way more suited to somebody taking their post surfing lesson steps than others. For example, a gently sloping beach break will allow you to perfect your skills far easier than a heavy reef break.
The best example I can think of to demonstrate this is the village of Canggu in Bali. At one end of the zone is Old Mans, possibly the most perfect spot to learn to surf. Old Mans has slow peeling waves that seem to go on for ever. Larger surfboards are perfect at this break and it is truly a mecca for beginners. There are numerous surfing lessons here throughout the day.
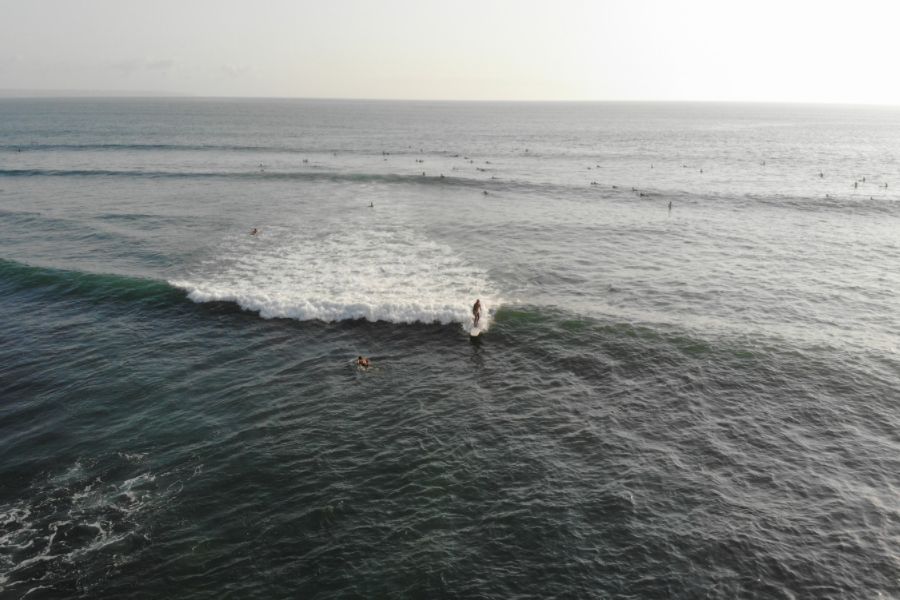
Old Mans in Canggu Bali - One of the best beginners waves on the planet
At the other end of the zone (surfing spectrum) is Canggu Sandbar. Sandbar is a heavy, hollow break that is dominated by tube seeking pros. It can break boards, damage bodies and is the antithesis of a beginners wave. Anyone who does not possess the requisite skills and experience will find themselves in trouble at the sandbar, even when the waves are relatively small. You very rarely see surfing lessons on this stretch of the beach.
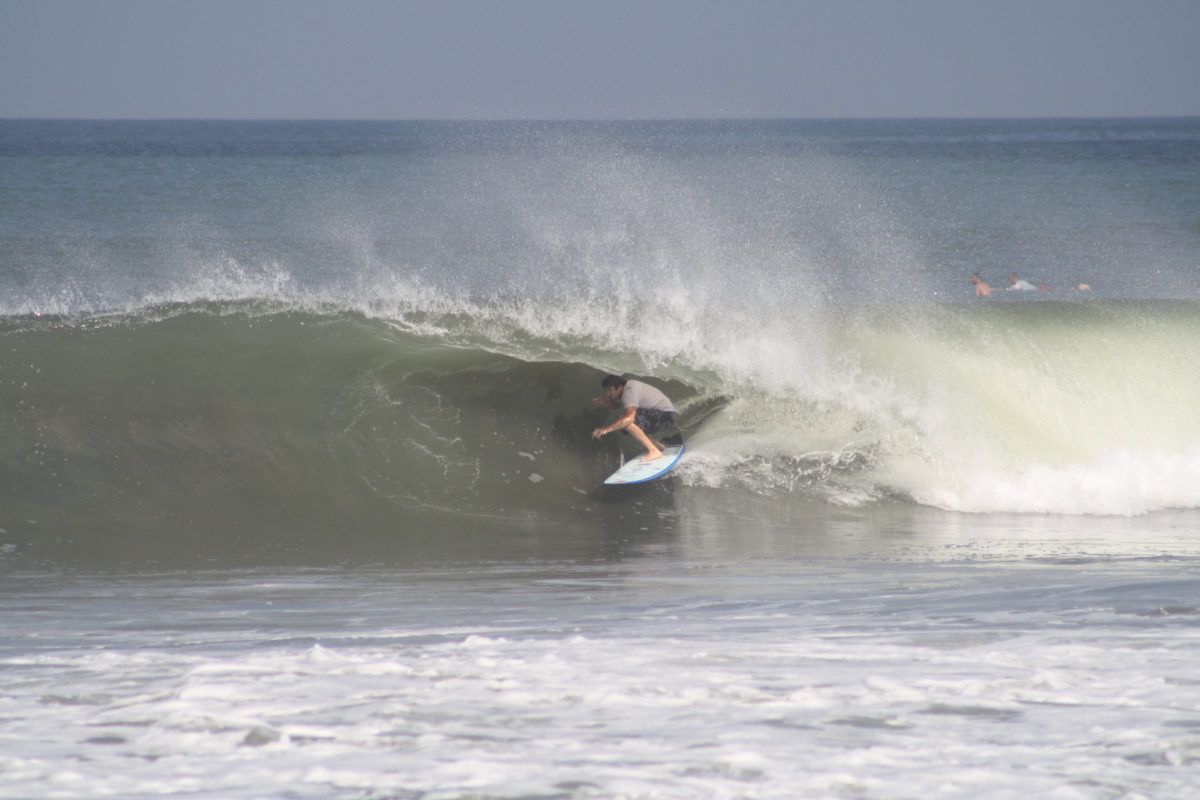
Canggu Sand Bar - Despite the small wave size you can see how unsuitable it is for beginners.
My advice is to always take the time to observe and research the spot you are planning to surf. Ask locals for advice or look online for guidance. Never just paddle out because there are other surfers out there, even if the waves look a manageable size.
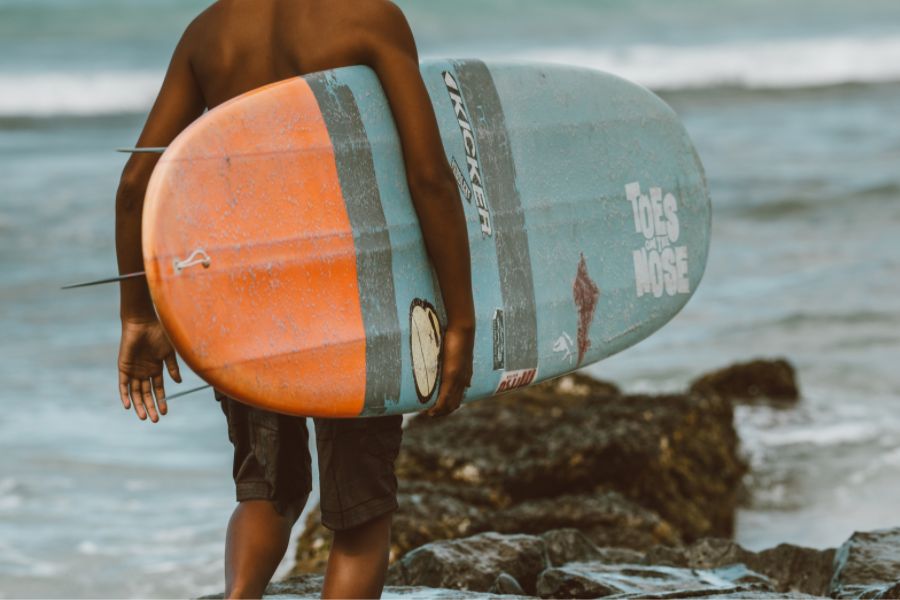
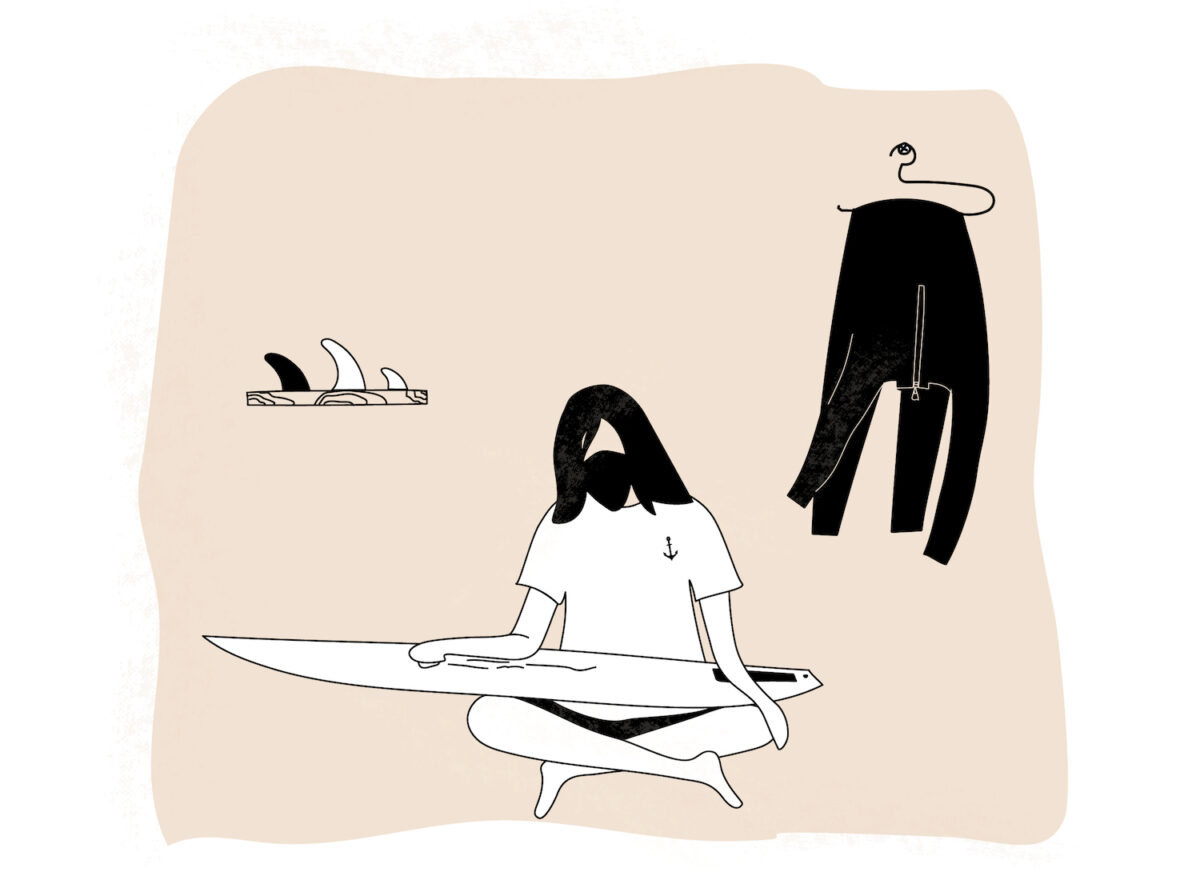
Choose The Right Surfboard
"The right choice of board should give you excitement, joy, and put a smile on your face."
Stephanie Gilmore, 7 time world champion
One of the most common things I see is beginner surfers choosing the wrong surfboard. Surfboard shaper of over 50 years Roger Tout shared the following:
"Over the years I have lost count of the times someone has tried ordering a board completely inappropriate to their level of surfing. Guys and girls, fresh off of surfing lessons, who should be riding mini mals between 7'0" and 8'0" are asking me to shape them 5'10"s, because that's what their favorite pro is riding. Surfing is a hard enough sport to master without sabotaging your progress with the wrong surfboard. Surfing is all about having fun! Catching and riding loads of waves is fun, missing every wave and going home with a sore back isn't fun!"
I'm going to echo both Steph and Roger. The right surfboard is a catalyst for progressing as a surfer, the wrong surfboard can hold you back for years, or even cause you to give up the sport.
The board you rode during your surfing lessons was a giant beast of a thing for a reason.
Surfing is a very fashion influenced sport. Our favorite surf brands produce items of clothing and accessories that help us create our identity as surfers. We adopt our own slang terms to describe the feeling of riding waves, often to the point that non-surfers struggle to understand what we are saying.
It is perfectly achievable to wear the same board shorts or bikini as your favorite pro surfer, and enjoy the same benefits. However, when it comes to surfboards please take the time to look at all the options and discuss your requirements with someone who can give you sound advice. Try to avoid choosing a surfboard because it is the current trend, the most fashionable choice, or because your favorite pro tour rider is ripping on theirs.
Pro model and high performance boards are functional for high-speed and technical surfing. They enable surfers to perform the most advanced moves in critical parts of the wave. Performance boards are not designed for easy paddling, easy wave catching or creating a stable platform to ride on.
There are plenty of great options out there for the beginner surfer. The best bit of advice I could give is that you get better at surfing the more waves you ride. Go for a surfboard that enables you to catch as many waves as possible and minimizes the number of sessions that leave you frustrated. Lots of surf shops have demo models that you can use for free or for a small charge. Don't be afraid to try a few out before spending your hard earned cash.
It might be sensible to seek out the type of surfboard you used for your surfing lessons, at least for the first few months of progression.
Remember:
"The best surfer out there is the one having the most fun."
Phil Edwards, legend of the sport
Not the surfer with the most fashionable surfboard.
Learn to Read Surf Forecasts
We recently ran an article titled "The Best Surf Forecasts: A Comprehensive Guide". I thoroughly recommend you click the link below and take a look at the best surf forecasts available and how to read them. The article is packed full of information and teaches you how to get the most from the forecasts. Although your surfing lessons were not dependent on optimum conditions, as you improve, forecasts will become a very important factor.
/guides/best-surf-forecasts
Learn to Read Tide Tables
When it comes to tide tables, what might appear confusing at first is actually quite simple. Knowing when high and low tide occur is so important, and will help your progression no end.
The break you plan on surfing might turn into a horrendous close out shore break at high tide. Or perhaps the rip currents are terrible at dead low tide.
You need to know the tide cycle to best plan your sessions, so you never turn up unprepared.
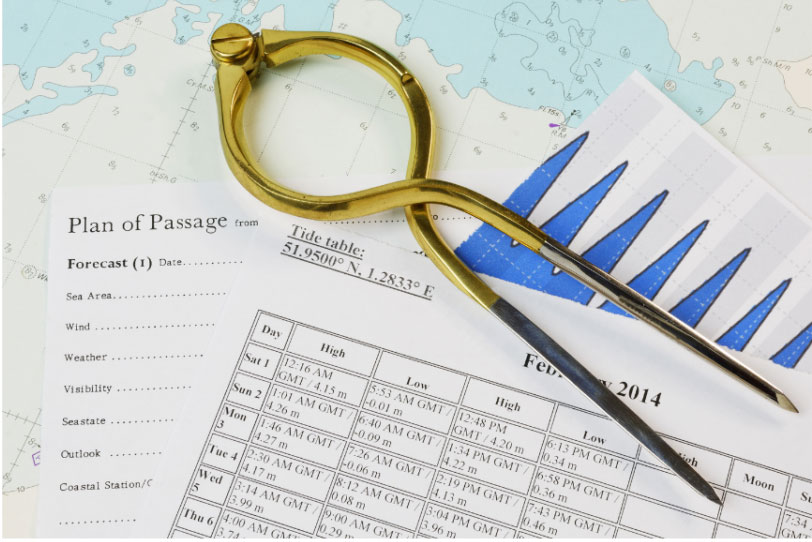
Although different tide tables may have different formats, they all contain three basic bits of information. The date, the time, and the tide height.
Most surfing destinations on earth have two low tides, and two high tides each 24 hour period. Some areas, however, may only have one low tide and one high tide. Tide tables give you predictions as to which time of day or night these events will occur.
It is usually very simple to find the day and times of low and high tide on the tide table.
What is slightly more difficult to understand is the height of the tide.
You may have heard surfers mention that a certain sand bar only breaks on the largest tides of the year. Or perhaps that a reef break becomes unrideable during the biggest high tides.
This height refers to "tidal range", meaning the difference between the water level at low tide and high tide. Tidal range is affected by the position of the moon and sun.
The global average for tidal range is 09-1.0 meter. At some surf breaks the difference between high and low tide is barely noticeable and the same spot will break all day long.
Some spots however have far larger tides. The beaches around Cornwall in South- West England experience a tidal range of up to 8.0 meters! If you stood on the beach at high tide, by the time low tide came around you could be some 3-400 meters from the waters edge.
Take some time to study the tide table and learn how the various tidal ranges affect the waves you plan on surfing. Don't be afraid to ask a more experienced surfer about spots to head for during the different sized tides.
Check out the fantastic "Tides Near Me" for a comprehensive online tide table.
Perfect Your Wax Job
Have you ever spotted another surfers board in the carpark and developed wax job envy? How on earth did they get those perfect beads of perfectly white wax to build up so beautifully?
The soft top board you used during your surfing lessons probably didn't need waxing.
Do you look at the smeared, slimy brown excuse for a wax job on your new board and wonder how you are supposed to stay on your feet?
The perfect wax job is a work of art, and makes the surfing experience so much more pleasant.
It's actually not as difficult as it looks.
Just don't listen to surf photographer and magazine editor Roger Sharp!
***“***You should always tell at least one newbie that the wax goes on the bottom of the board to make it go faster, like a snowboard, then watch the confusion.”
Firstly, clean off all that ugly brown wax from your surfboard. Usually an hour in the sun, or a few minutes under a hairdryer will do the trick. Once soft you should be able to scrape it off with a wax comb.
Now your board is nice and clean, let's think about the type of wax you're going to use.
Wax is graded by the type of water temperature it is suitable for. Usually manufacturers produce Cold (the softest), Cool, Warm and Tropical (the hardest).
Sticky Bumps Tour Series Surf Wax Cool/Cold
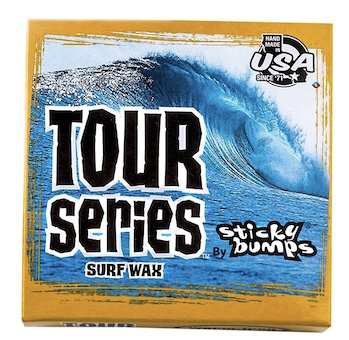
Sticky Bumps Surf Wax
Tropical
Sticky Bumps Surfboard wax
Base Coat
My advice is to first lay down a base coat. Some wax companies make a bespoke "base coat", but generally choose a harder wax than you will use before you surf. I find that tropical is a bit hard for the temperatures at home, but warm is perfect for my base coat.
I personally like to use the edge of the block of wax and create a crosshatch pattern of straight lines across the deck of my board.
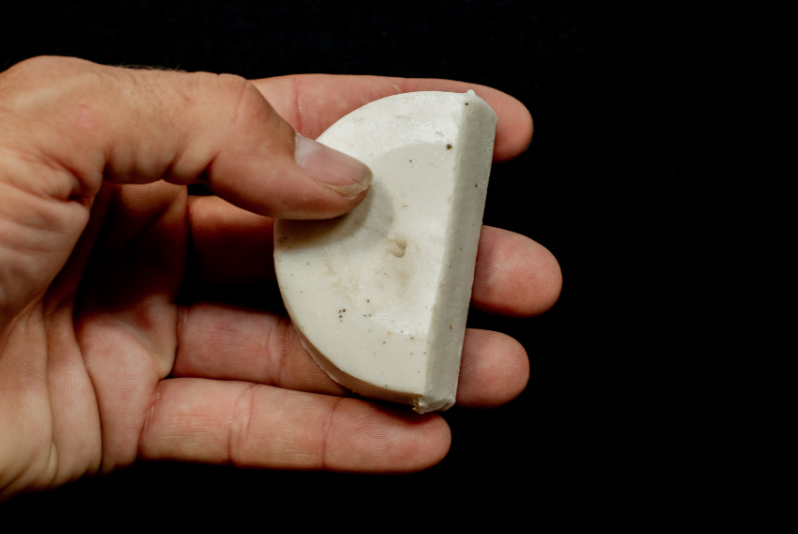
Don't push too hard, and go over each line a few times to start the little foundation bumps that will eventually form those envious beads.
Once your deck is covered in a crosshatch pattern of base coat, take a fresh block of whichever wax is appropriate to your water temperature. Place the block flat on the deck and apply light pressure with your hand. Move the wax in small circles until you feel the base coat "bite" into the top coat. Once you find the "bite" your pressure is perfect. Keep moving the wax in small circular movements until you have the dream wax job.
If you want to be really decadent, try a small scrape of extra sticky wax right where you place your feet. Trust me, it's luxurious.
Practice Good Surf Etiquette
What is surf etiquette? Think of an ancient set of rules (notoriously disregarded nowadays) that every surfer should abide by to ensure the experience of everyone in the water is a good one.
While your surfing lessons were pretty much a free for all, consider surfing etiquette as a modern day Ten Commandments of surf.
- Never Drop In - Taking off in front of a surfer who is already up and riding a wave is called dropping in and is a cardinal surfing sin.
- Respect the Right of Way - The surfer sitting furthest toward the peak of the breaking wave is next in line to catch a ride. The person sitting adjacent to him is second in line and so on. When you paddle out do not under any circumstances think about paddling through to the front of the pack. Set up at the end of the line and wait your turn.
- Do Not Snake - Snaking is the term for paddling inside of a surfer, or group of surfers as mentioned above, in order to gain right of way. This is a disgraceful act and heavily frowned upon.
- Don't be a Wave Hog - Just because you've taken the advice from earlier in the article and bought yourself the perfect surfboard, aka The Wave Catching Machine, don't take every wave if you are surfing with other people.
- Be Friendly - Paddling out with a smile on your face, making eye contact and politely saying hello goes a long way to easing tensions at crowded surf spots. However, don't think that just because you've got a smile on your face its ok to start dropping in and snaking!
- Paddle Out in The Correct way - Make sure you either paddle out wide of where everybody is surfing, or if you have to paddle out in an area where waves are being ridden, try your hardest not to impede someones ride. If you can see you are going to one close to a surfer who is up and riding, paddle toward the whitewater. You might take a bit of a beating, but not only will you prevent an accident, you will gain the respect of the surfer who's ride you protected.
- Never Ditch Your Board - Never let go of your surfboard and dive under a wave. A loose board the easiest way to injure fellow surfers. If you cannot duck dive the wave, or at least hold on to the board, chances are the conditions are not suitable to your current level.
- Assist Other Surfers - If you see another surfer in trouble, help them out. If you see someones board heading toward the rocky shoreline after breaking a leash, grab it and hold on to it for them. Chances are it will be you in that situation one day.
- Respect the Locals - This may sound a little cliche, but showing respect to the guys and girls who surf that spot every day can make for a great days surfing. I always try to give the locals a wave, even if I have right of way. I will always congratulate a local on a great ride. This definitely smoothes your acceptance into their line up and who knows, they might even share a bit of locals only knowledge with you.
- Apologize if Necessary - If for some reason you do inadvertently drop in or snake somebody, paddle up to them afterwards and extend an olive branch. It's amazing how many friends are made in a lineup when one surfer has the decency to say "I'm so sorry I dropped in, I genuinely didn't see you paddling, the next wave I have right of way for is all yours".
Repair Your Own Dings
Surfboards get damaged, it is an unfortunate rite of passage. Rocks, other peoples surf-craft, car doors and ceiling fans are not friends of your board.
Most surf schools use the soft top type boards for their surfing lessons for two reasons. Firstly they are less painful to bash yourself on. Secondly they do not ding as easily as foam and fiberglass boards.
Regardless of whether you ride a PU (polyurethane) or EPS (expanded polystyrene) board, they are basically a piece of very delicate foam covered in a thin layer of fragile fiberglass.
There are plenty of excellent professional ding repair people out there. Some situations require a professional approach and you should avoid a home fix (see below). However, by learning to fix small dings yourself, you will save yourself plenty of money. It is also very satisfying to take your board from unrideable to watertight.

The most common types of ding are:
- Pressure Dings - These are areas of compression that usually occur on the deck from foot or knee pressure.
- Nose, Tail and Rail Dings - These dings are usually cracks from impact with rocks or other inanimate object.
- Delaminations - Delams happen when the fiberglass layer lifts away from the foam core. They usually happen when a board gets too hot or has received a sustained beating. They are a tough diy repair and I recommend seeking the advice of a specialist.
- Fin Damage - When you drop your board or ride into shallow water often times the fins take the brunt of the damage. I would always ask a professional to repair your fins.
- Buckle, Crease or Breakage - This is usually game over for a surfboard. Buckles and creases affect the integrity of the core and often result in unwanted flex. A full break is catastrophic. Many great boards have been relegated to a piece of wall art following a breakage. An excellent ding repair specialist can salvage a buckled, creased or broken board, but chances are it will never be the same again.
Get hold of a well equipped ding repair kit, appropriate to the type of surfboard you own (PU or EPS).
Greenlight Surf Supply Ding Repair Kit
You can speak to your local shaper or surf shop about a ding repair kit. Alternatively companies such as Greenlight Surfboard Supply have brilliant ding repair kits you can buy online.
Do remember though guys, your repair kit must be appropriate to your PU or EPS surfboard. If in doubt, ask!
Before you attempt to fix a ding, make sure the area is completely dry.
The first step for a ding repair is to cut away any loose material from the damaged area. Use a sharp blade, taking utmost care.
Once the loose stuff is removed, clean the area of wax, grease or sand.
Use masking tape to surround the ding. This protects the area around the ding and creates a handy reservoir for the next step.
Mix up the resin, or Q-Cell if you have it, according to the instructions. Use a wooden spatula or coffee stirrer to gently pour the resin into the damaged area. Make sure that every part of the ding is filled.
Once completely dry you can sand the area until the repair is flat with the surface of the board.
Next, cut two pieces of fiberglass cloth, one slightly larger than the other and both larger than the ding.
Apply the smaller piece of cloth to the ding. Using a paintbrush apply a bit of resin to the cloth so it sticks.
Apply the larger piece of cloth using the same technique, making sure the resin is spread thinly and evenly.
Again, wait for the resin to harden and dry completely. Sand the area until it is completely smooth, making sure you don't sand too hard.
Apply another really thin layer of resin to the repair, known as a sanding coat. Allow it to dry and then wet sand the area with high grit (320-600) sandpaper. If you want to get really nerdy you could even break out some polishing compound to really get the ding repair sparkling.
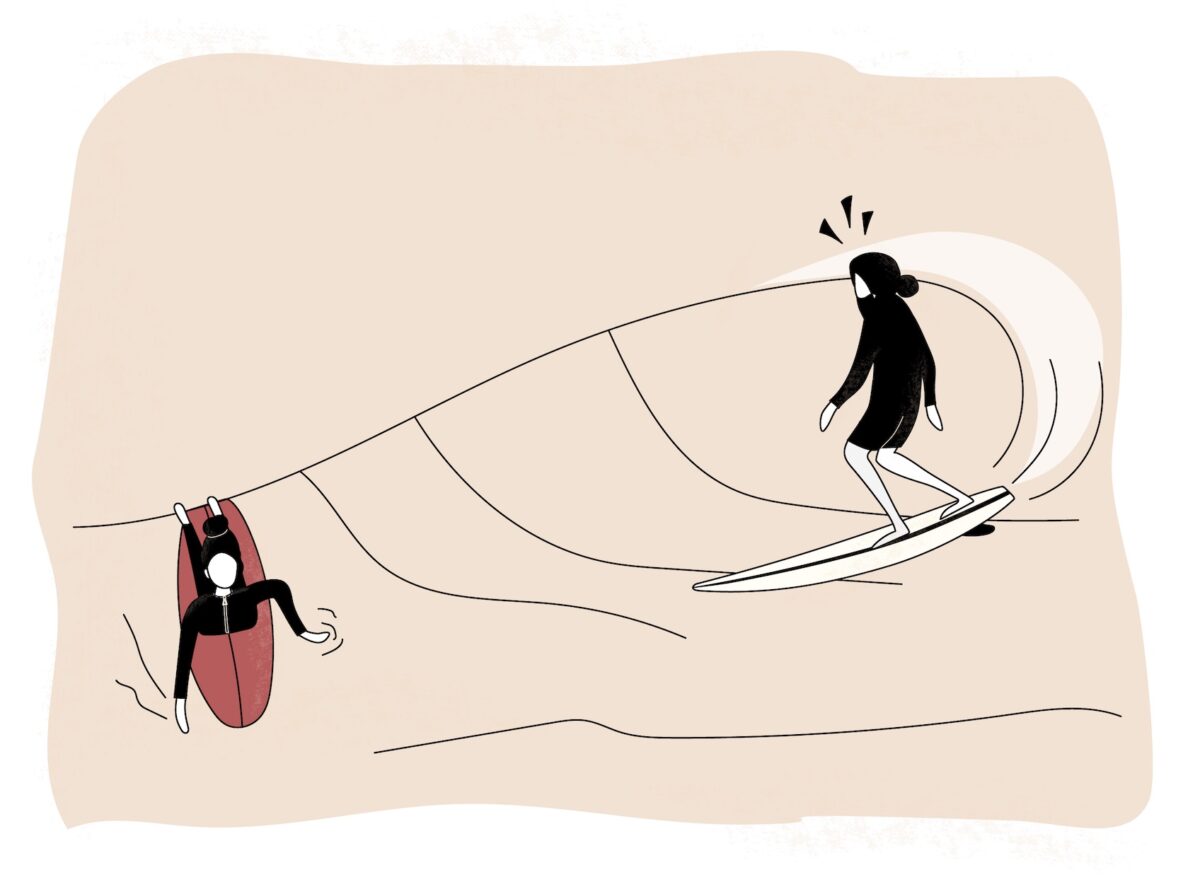
Spot Rip Currents
A rip current, or simply a rip, is a strong current of water which occur in areas of breaking waves. They can be a surfers best friend (paddling out through heavy surf) or their worst nightmare. Lifeguards in the USA rescue in excess of 30,000 people from rips each year.
During your surfing lessons it was the instructors responsibility to keep you away from rip currents. Now it's down to you to stay safe.
Rips will usually be located either side of a sand bank, or at the end of a small beach or cove. Rips are extremely common around man-made structures such as piers, jetties and harbors. They can vary from 15 meters wide to over 100 meters wide, with speeds ranging from 0.5 meters per second to 2.5 meters per second.
To put this into perspective a rip current can be as wide as a football pitch is long, flowing at speeds quicker than an Olympic swimmer.
A really simple formula (although not hugely scientific) for rip currents is to think the following. The water that is coming toward the beach in the form of waves, has to return back out to sea. The key is to find the spots where the water is escaping.
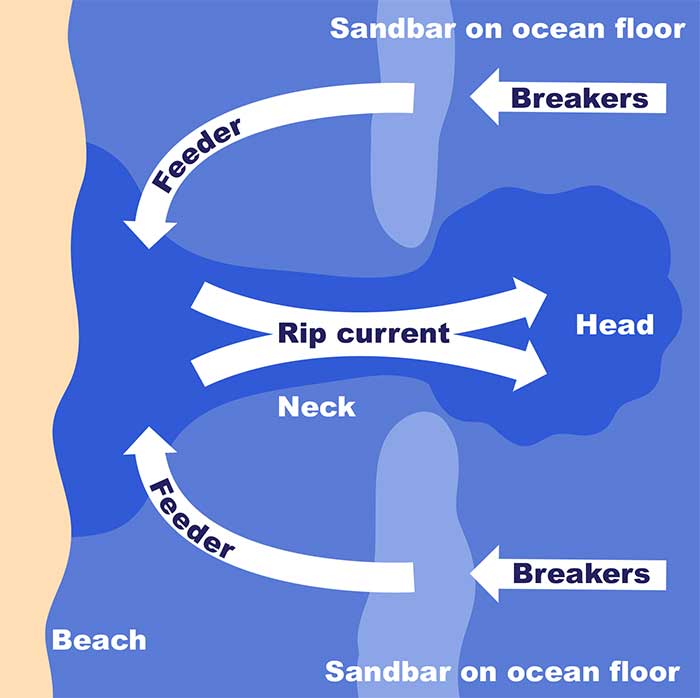
Diagram showing how the incoming water escapes back out to sea
Rips can be notoriously difficult to spot, but there are some fundamental things to look out for.
Generally waves will not be breaking in a rip current. Keep an eye out for areas of flat water within the breaking waves.
Seaweed, or other floating detritus heading out to sea indicates a rip. Water discolored by sand can also be a fantastic indicator.
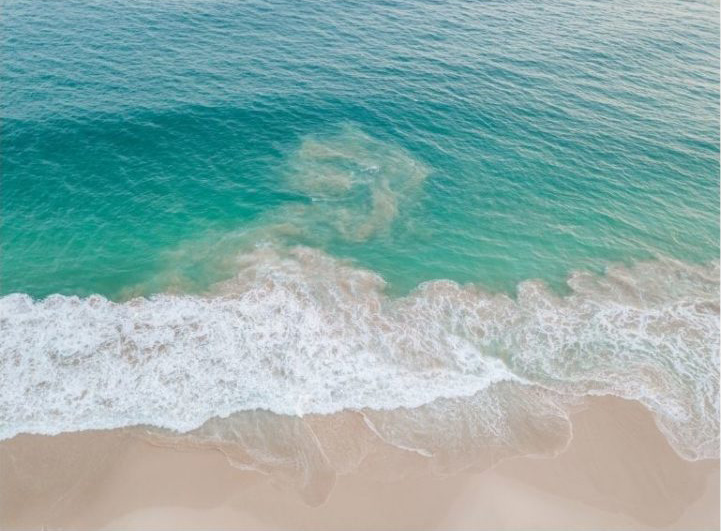
Water discolored by sand being pulled out to sea in a rip current
At this stage in your surfing progression it is good practice to spend a bit of time identifying rip currents. It is sensible to avoid them until you reach a level where you can use them to your advantage.
Have Fun at All Costs
Remember the earlier quote from legendary surfer Phil Edwards. Never a truer word said about our fantastic sport.
Surfing should be the absolute highlight of your day. An opportunity to escape the stresses of everyday life, and remove yourself from the incessant tone of social media notifications.
Try to avoid taking yourself too seriously when you're surfing, and don't analyze your session super hard afterwards.
Don't stress if the photo or video your mate shot doesn't make you look like Kelly Slater or Carissa Moore.
"The worst day of surfing is better than the best day at work"
Surfing for me is the best way to improve my day, and put a smile on my face.
If you find yourself unhappy surfing in a huge crowd, get out and walk down the beach to a quieter stretch. Sometimes surfing a two foot close out with a handful of people can be more rewarding than battling a hungry crowd for three foot peelers.
If you ever feel a bit despondent at the learning curve required for surfing, look at what you have achieved rather than what you are struggling to achieve.
Remember how much fun you had during your surfing lessons. That's what surfing is all about.